As part of the preparations for next week’s partner programme launch, I’m capturing the key points of the onboarding process in a series of reference pages. Those that seems fit to publish I’ll post here on the Agendashift blog.
Step 1: Sign up
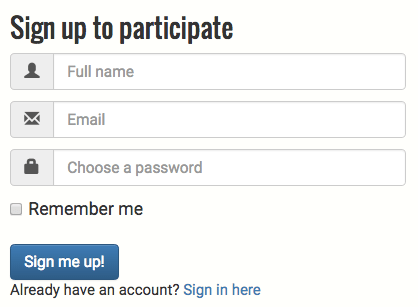
You may have done this already. If not, the way to get an Agendashift user account is to participate in a survey. There’s always one running at www.agendashift.com/surveys/featured and you can see it here on the home page:

Sign up with your full name, preferred email address, and password (at least 8 characters long):
Thoughtfully, and with a real situation in mind as you do it, have a go at the survey. As described in the sign up page, you’re seeing the “mini” version of the Agendashift values-based delivery assessment. This includes 18 of the 40+ prompts of the full template, organised by the same values – Transparency, Balance, and so on.
Step 2: Provide your profile details
Once you’re done with the survey (it will take only a few minutes), take a look at your user profile. If you plan to join the partner programme or if you want others to see your profile it will be worth the few moments it takes to give it some polish.
You can reach it by clicking “My profile” on the “Account” menu, seen here in both desktop and hand-held screen widths (on the latter it’s hidden behind the “hamburger” menu)


Here’s mine:

Note that the image displayed is the gravatar associated with my email address. If you don’t have one, register for yours at en.gravatar.com. Be aware that it may take a few minutes after registration before yours appears (don’t ask me why).
Other than your email address and your gravatar, everything here is editable. Hit the Edit button and you’ll see something like this:

Most of this is self-explanatory, but a few notes:
- You can add relevant credentials such as “KCP” or “CSM” to your title if you wish
- The fields for your website, LinkedIn, Twitter, Facebook etc are all completely optional. If you wish to use them, please enter full urls beginning with http:// or https://
- The “Viewable” checkbox controls whether your profile page is accessible by people other than your survey administrator or the site admin (ie me). This field becomes somewhat redundant should you wish also to be “Listed” – the latter implies the former.
- Whether or not you appear in the partner directory is under our joint control. “Listed” indicates you’d like to be there (you may have valid reasons not to, even if you are a partner).
- If “Listed” is checked and I in the role of administrator have checked “Listable” also, then bingo, you’re in. I also control whether you are able to administer your own contexts and surveys. These adare visible only to me; I update them during the onboarding process:

Step 3: Hey presto!
Finally, here’s what my listing in the partner directory looks like:

This entry neatly summarises almost all the information provided: name, title, location, and online identities. The only information that remains to be seen only in the profile page is the bio.

Blog: Monthly roundups | Classic posts
Links: Home | Partner programme | Resources | Contact | Mike
Community: Slack | LinkedIn group | Twitter
